Setting up your Bitbucket Pipeline
It took me a little while to get my head around Bitbucket Pipelines. The documentation isn't awful, though I've got to say their assertion that you can test the pipeline locally is pushing it a bit (you can stand up the Docker container you're using on your local machine and try running the commands you want in your pipeline file, which isn't really the same thing).
Actually I think it was the Docker part that got me. Each pipeline runs on a Docker container. You can use one of Atlassian's, you can make your own or you can see how you get on with this one that I made.
If you want to try it out locally, you can build it using:
$ docker build -t homepage_builder ....then you can run a shell in the container using:
$ docker run -it --rm blog_build /bin/sh Then you can test out your commands inside the container.
You'll probably spot that the Dockerfile takes the basic Linux Alpine distribution, then itself installs node, npm, Angular and the AWS CLI. Right now it doesn't need Angular, but we'll add some tests to the repo quite soon, and we'll need Angular to run them.
There's not a whole lot left for the pipeline itself to do :
image: jamesdesq/homepage_builder:v0.1pipelines: branches: master: - step: name: Build and deploy script: - npm install - npm run build:serverless:deployThe pipeline is doing a few things. The first line pulls the Docker image we want to use to do the build. The branches section specifies that we want the pipeline to run when something happens in our master branch (currently that means a push or a merge, but you can configure it to be more restricted than that. Then our build and deploy step generates the node_modules folder and pushes everything to AWS. There is one more thing you're going to need to do to accomplish the push part, though.
Configuring AWS to work with Bitbucket
IAM is AWS's user management and access control system. You'll need to set up an IAM user for BitBucket.
First of all, we'll set up a group for the user to belong to. Open the AWS console and go to IAM, then choose Groups from the left-hand menu and click Create New Group. Call it something descriptive, like Bitbucket Users. You'll need to add the following policies to the group:
- AWSLambdaFullAccess
- AmazonAPIGatewayAdministrator
- AWSCodeDeployRoleForCloudFormation
- AWSCloudFormationFullAccess
- IAMAccessAdvisorReadOnly
- AmazonS3FullAccess
Now we'll create a user:
- Click Users in the left hand menu, and click Add User
- Call your user Bitbucket
- You'll be asked what access type you want. Give the user programmatic access but not console access
- You'll be prompted to add the user to a group. Add it to the Bitbucket users group you created above
- At the end of the process, you'll get to a screen where you can create an access key. Make sure that you do this, and make sure to download the CSV file with the key and the secret in it. And also make sure you never give it to anyone! Once you've finished with it, eat it or something
Add your key and secret to Bitbucket
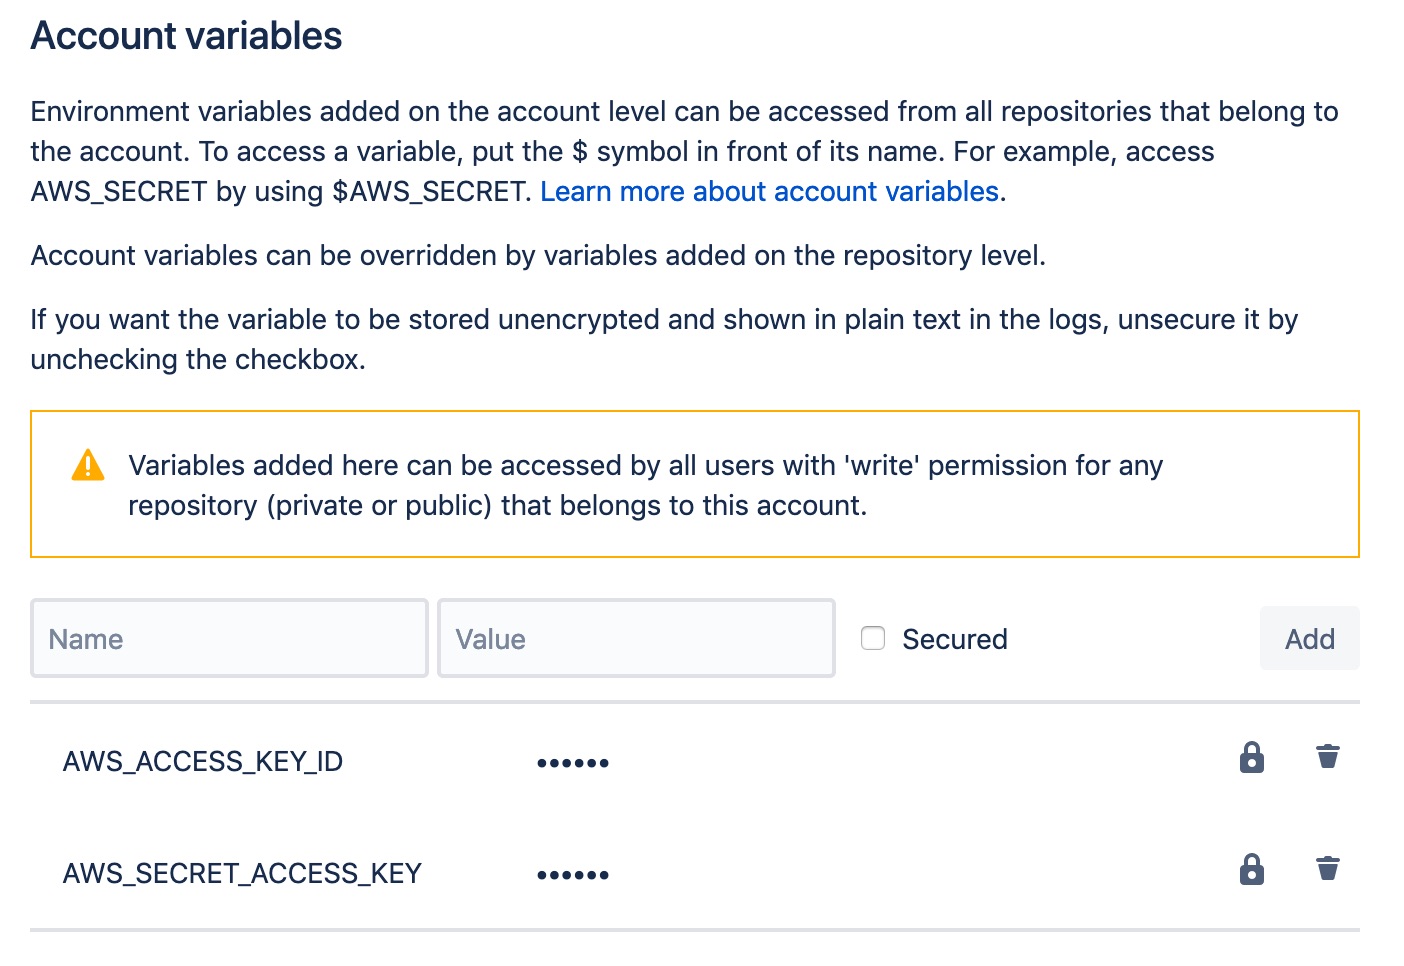
For our purposes, we can add our key and secret as account variables. Bitbucket account variables are a bit fiddly - it seems like you can set them in several different places. In our case, we'll set them at account level. Log into your account, click the user icon in the bottom right, then choose Settings, then Account variables.
You can then add your key and secret like this:

You'll need to use these exact names - AWS_ACCESS_KEY_ID and AWS_SECRET_ACCESS_KEY. And don't forget to check the Secured checkbox, otherwise your key and secret will be visible to anyone who can log into the account.
We're good to go
You've now got a Bitbucket pipeline that will build your application and push it to your AWS account any time you push or merge into your master branch. Give it a try!